
Camunda 流程引擎基礎介紹
首先安裝必要的軟體
- JDK (>=1.8)
- Camunda Modeler
- Camunda Platform 7
- Eclipse (IDE)
- POSTMAN
Camunda 簡介
Camunda is an open-source platform that uses a workflow engine and decision engine to automate business processes.
以上是官方網站的簡介,Camunda 是用來管理工作流 (Workflow) 的引擎,它可以自動化決策與管理工作流。使用Camunda 引擎可把商務邏輯的與其他系統程式部分隔離開來來。大型的商務資訊系統,如果沒有引入流程引擎這類技術,常常會把業務邏輯分散在各個不同的程式碼中,管理起來困難,也容易出現商務邏輯與系統程式過耦合,造成改動一個小地方,卻讓商務邏輯的部分出現不預期的bug。
BPMN (Business Process Model and Notation)
BPMN翻譯為資料流程模型標記法 ,是Camunda用來管控的Process的單位,也就是一個業務的邏輯。需要用BPMN的關係是因為,實務上許多的商業行為,隱含著複雜的邏輯,比如說我們使用網購平台下訂一個訂單,其對應的BPMN可能如下:
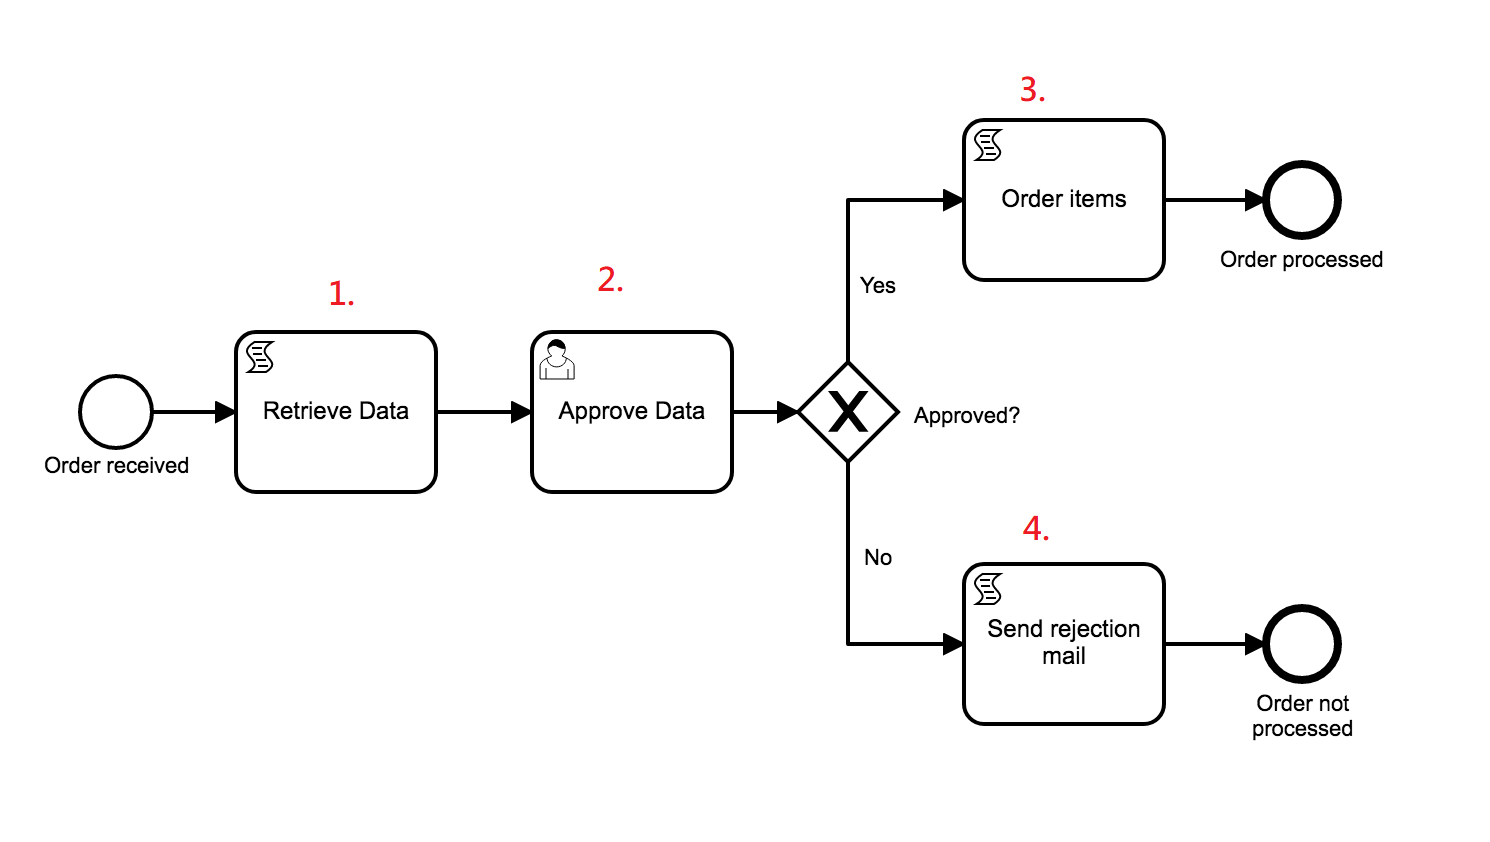
當我們用網購平台下單完成後,網購平台會收到一些我們的資訊(1),包含訂購者姓名、刷卡資料、結帳資訊、款項是否轉帳成功、收信地址、寄送方式等等。以上的電商平台會彙整以上的資訊,然後在步驟(2) 等待人員做確認批准,這裡可能有兩種可能,如果 approve (3)那就與供應商下訂單,準備出貨包裝運送,如果 disapprove,也就是 (4) ,就發送一個Email,告訴使用者他他缺失某些資料未填寫。
壹、建立DMN Decision Table 並且用 REST API 取得 DMN判定結果
DMN (Decision Model and Notation) 決策表,是BPMN的一個子集,我們用Camunda Modeler 來繪製第一個決策表,這個決策表主要是簡單判斷一個平台上的負載量,負載量在平日與假日會有不同的標準。
建立自己的決策表 Decision Table
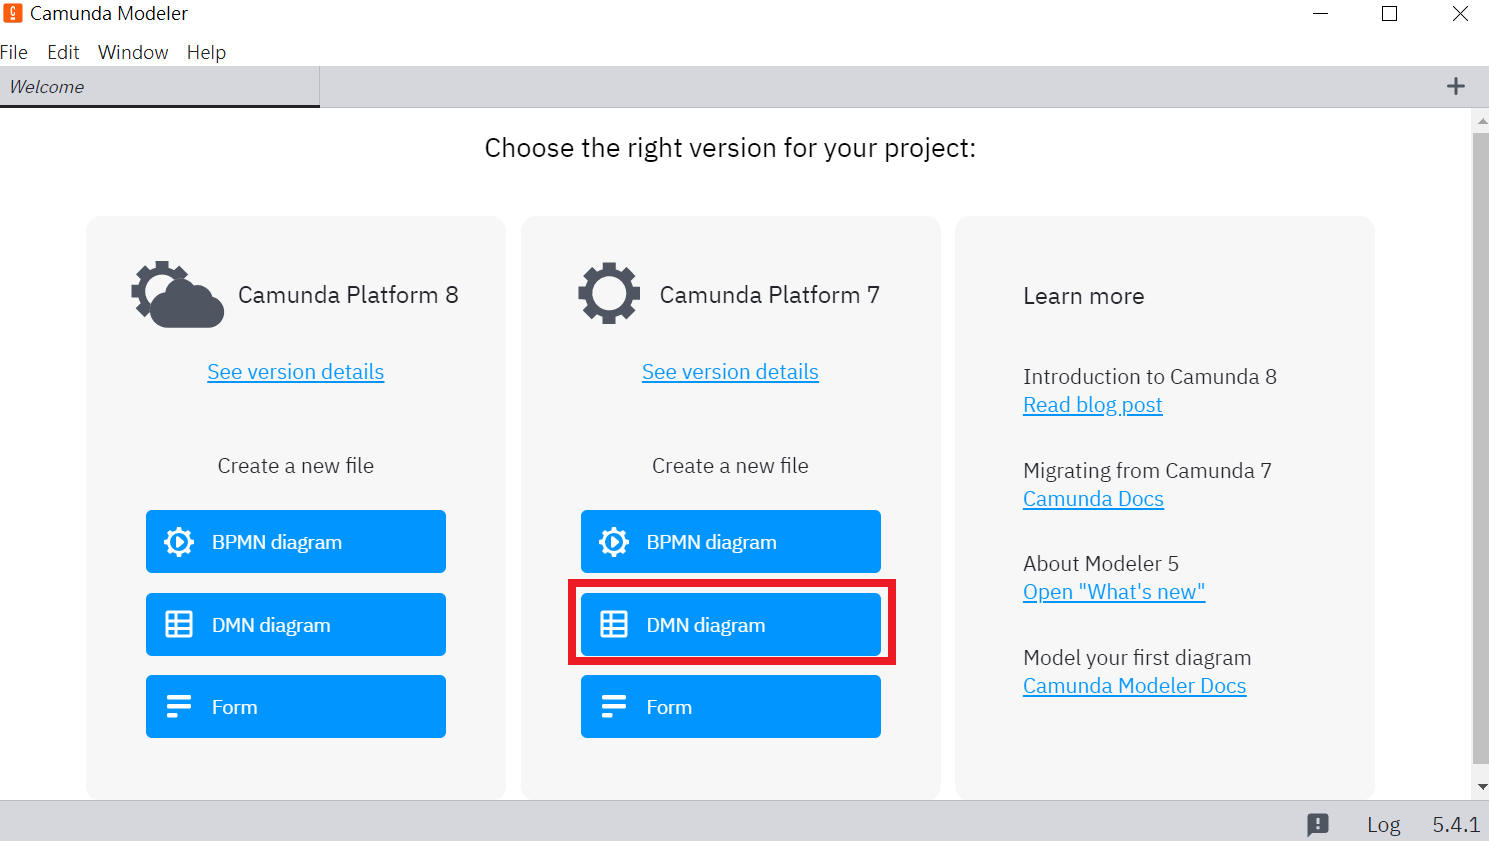
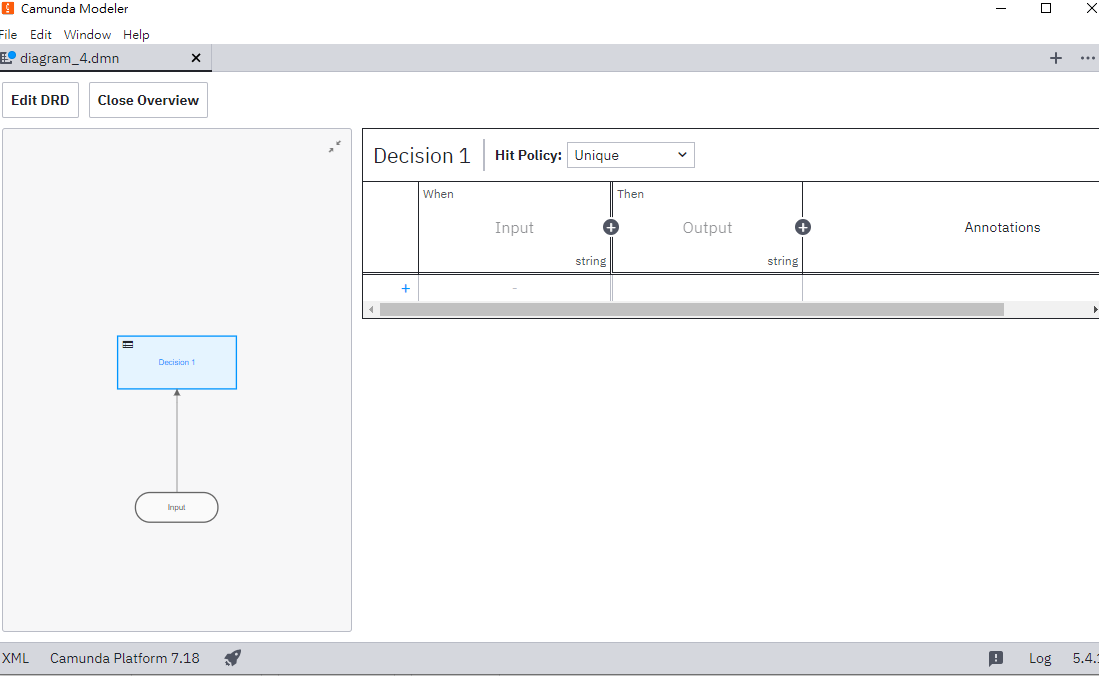
打開Camunda Modeler,因為我們要使用的是Camunda Platform 7,所以選擇Camunda Platform 7的 DMN Diagram
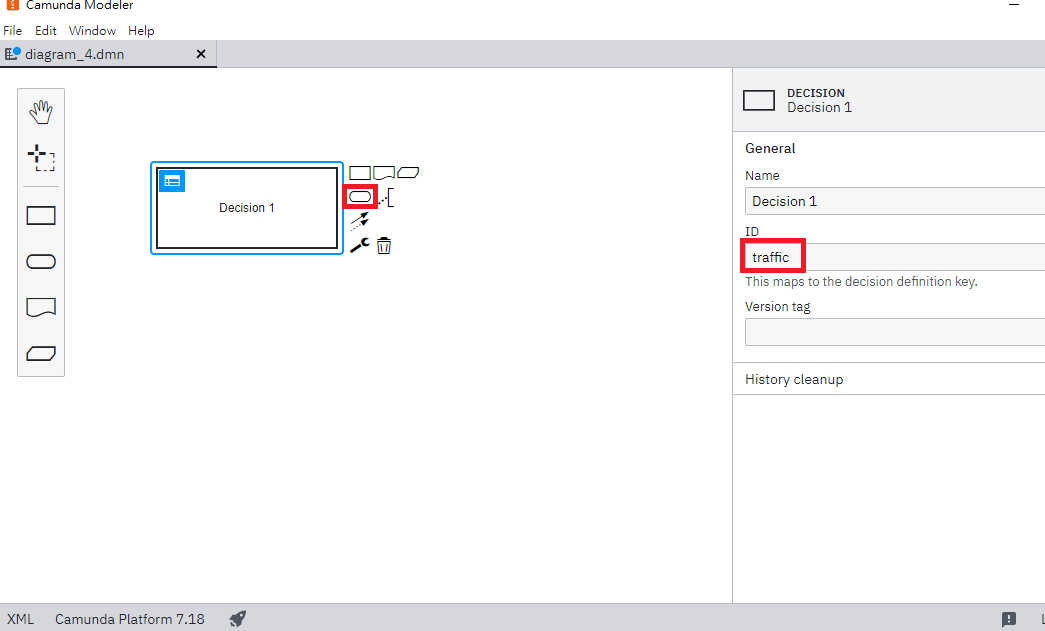
新增一個Decision Table,並且點選Decision 1 的方塊,點選新增Input,其中這個Decision Table的ID很重要,後面使用REST API會使用到
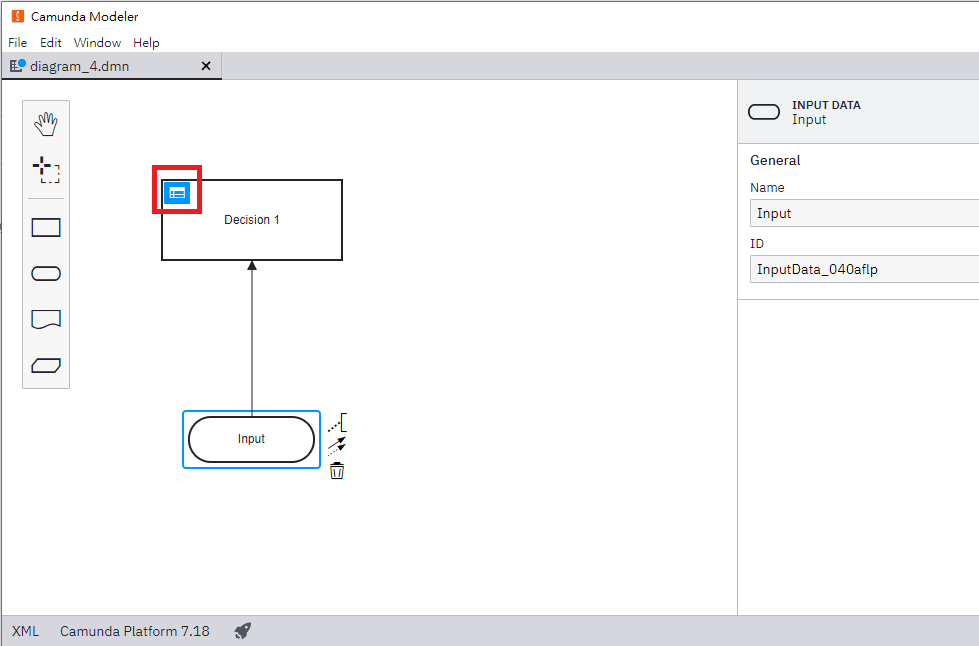
新增完成結果如下,接著點選Decision Table左上角藍色表單
跳出 Decision Table的 Input Output 介面,在這個表格可以新增Rule
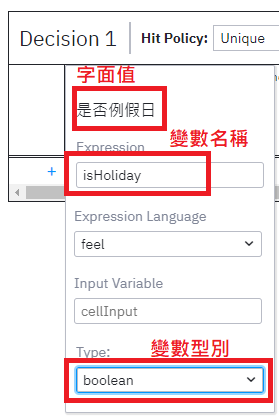
新增第一筆輸入是否例假日,這裡FEEL (Friendly Enough Expression Language ) 是一個Camunda在使用的語法,Expression代表的是變數名稱,也就是晚點我們用 Rest API 要POST上去的變數名稱
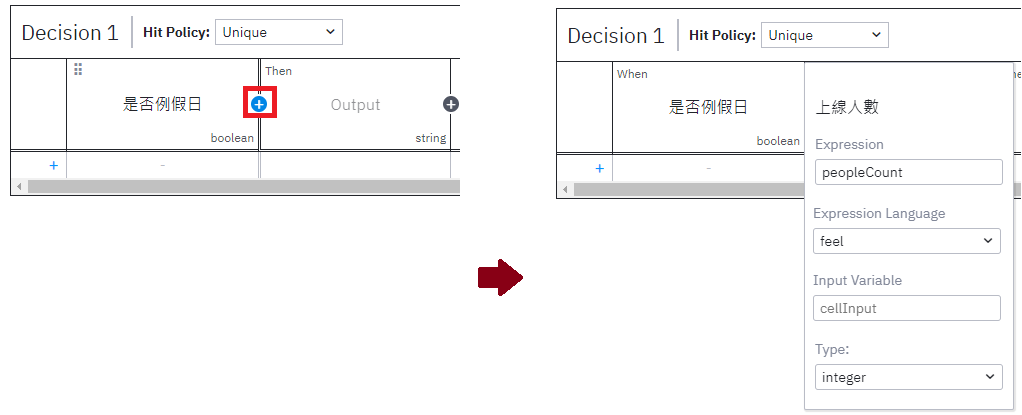
新增第二輸入,點選藍色加號,然後再新增上線人數 Input
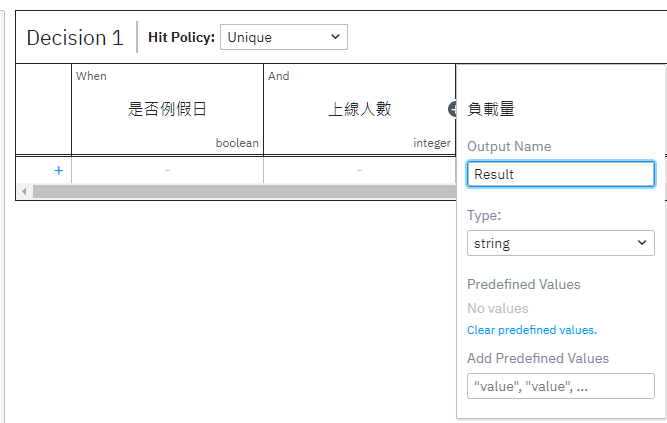
最後新增輸出 負載量 Result
新增幾個 RULE,也就是前面講的在平日與假日對於高負載的定義有所不同,在平日上線人數超過300就稱為高負載
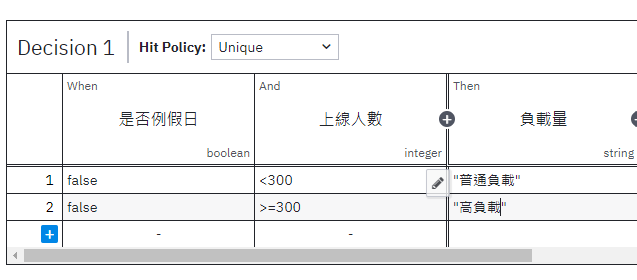
Rule 全部新增完成,畫面如下

以下是 traffic.dmn 的source
code,這裡可以發現.dmn是XML的格式,可以用文字編輯器打開
<?xml version="1.0" encoding="UTF-8"?>
<definitions xmlns="https://www.omg.org/spec/DMN/20191111/MODEL/" xmlns:dmndi="https://www.omg.org/spec/DMN/20191111/DMNDI/" xmlns:dc="http://www.omg.org/spec/DMN/20180521/DC/" xmlns:modeler="http://camunda.org/schema/modeler/1.0" xmlns:biodi="http://bpmn.io/schema/dmn/biodi/2.0" xmlns:di="http://www.omg.org/spec/DMN/20180521/DI/" id="Definitions_0vorwpz" name="DRD" namespace="http://camunda.org/schema/1.0/dmn" exporter="Camunda Modeler" exporterVersion="5.4.1" modeler:executionPlatform="Camunda Platform" modeler:executionPlatformVersion="7.18.0">
<decision id="traffic" name="Decision 1">
<informationRequirement id="InformationRequirement_09o6l0z">
<requiredInput href="#InputData_040aflp" />
</informationRequirement>
<decisionTable id="DecisionTable_1rlysul">
<input id="Input_1" label="是否例假日" biodi:width="191">
<inputExpression id="InputExpression_1" typeRef="boolean">
<text>isHoliday</text>
</inputExpression>
</input>
<input id="InputClause_081aref" label="上線人數">
<inputExpression id="LiteralExpression_0mrk63u" typeRef="integer">
<text>peopleCount</text>
</inputExpression>
</input>
<output id="Output_1" label="負載量" name="Result" typeRef="string" />
<rule id="DecisionRule_1uwxt9k">
<inputEntry id="UnaryTests_18h72hf">
<text>false</text>
</inputEntry>
<inputEntry id="UnaryTests_0m8rot7">
<text><300</text>
</inputEntry>
<outputEntry id="LiteralExpression_1mp5irp">
<text>"普通負載"</text>
</outputEntry>
</rule>
<rule id="DecisionRule_1vzm5y6">
<inputEntry id="UnaryTests_1kxr2uh">
<text>false</text>
</inputEntry>
<inputEntry id="UnaryTests_1d7tp2i">
<text>>=300</text>
</inputEntry>
<outputEntry id="LiteralExpression_09f9b7p">
<text>"高負載"</text>
</outputEntry>
</rule>
<rule id="DecisionRule_0pqa4uh">
<inputEntry id="UnaryTests_0lnzqas">
<text>true</text>
</inputEntry>
<inputEntry id="UnaryTests_08ba33g">
<text><600</text>
</inputEntry>
<outputEntry id="LiteralExpression_0g50a41">
<text>"普通負載"</text>
</outputEntry>
</rule>
<rule id="DecisionRule_0plo4lz">
<inputEntry id="UnaryTests_0mp1nva">
<text>true</text>
</inputEntry>
<inputEntry id="UnaryTests_1a6cabi">
<text>>=600</text>
</inputEntry>
<outputEntry id="LiteralExpression_1gkdbs5">
<text>"高負載"</text>
</outputEntry>
</rule>
</decisionTable>
</decision>
<inputData id="InputData_040aflp" name="Input" />
<dmndi:DMNDI>
<dmndi:DMNDiagram>
<dmndi:DMNShape dmnElementRef="traffic">
<dc:Bounds height="80" width="180" x="160" y="100" />
</dmndi:DMNShape>
<dmndi:DMNShape id="DMNShape_0boupm4" dmnElementRef="InputData_040aflp">
<dc:Bounds height="45" width="125" x="187" y="337" />
</dmndi:DMNShape>
<dmndi:DMNEdge id="DMNEdge_1dqdng4" dmnElementRef="InformationRequirement_09o6l0z">
<di:waypoint x="250" y="337" />
<di:waypoint x="250" y="200" />
<di:waypoint x="250" y="180" />
</dmndi:DMNEdge>
</dmndi:DMNDiagram>
</dmndi:DMNDI>
</definitions>將建立的 DMN 佈署到 Camunda Platform 上
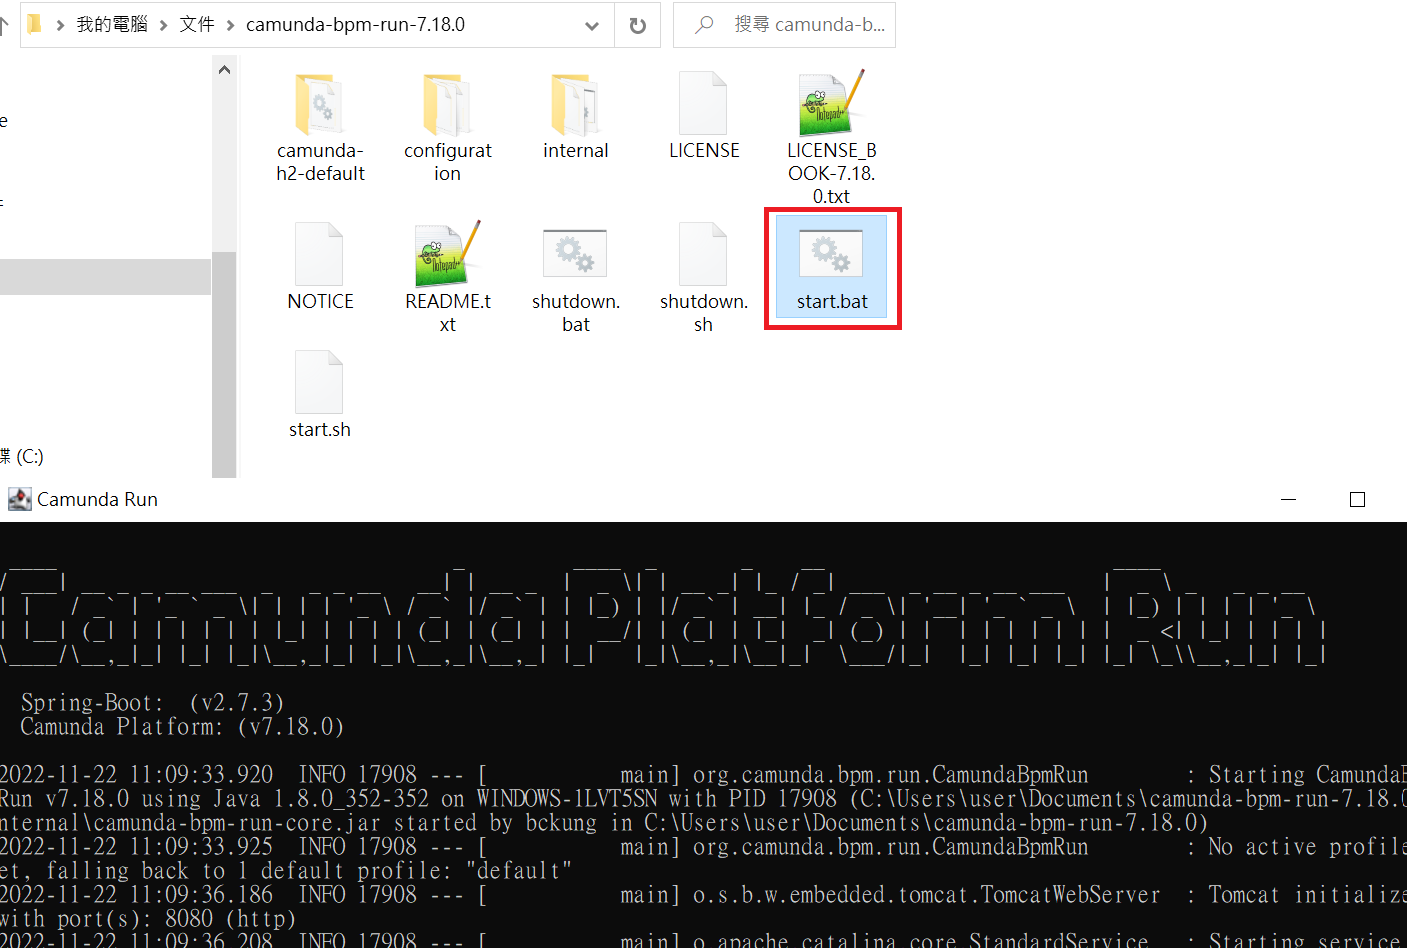
在DMN部屬到Camunda Platform上之前,需要先執行Camunda,我下載的是.zip檔案,直接到資料夾執行start.bat
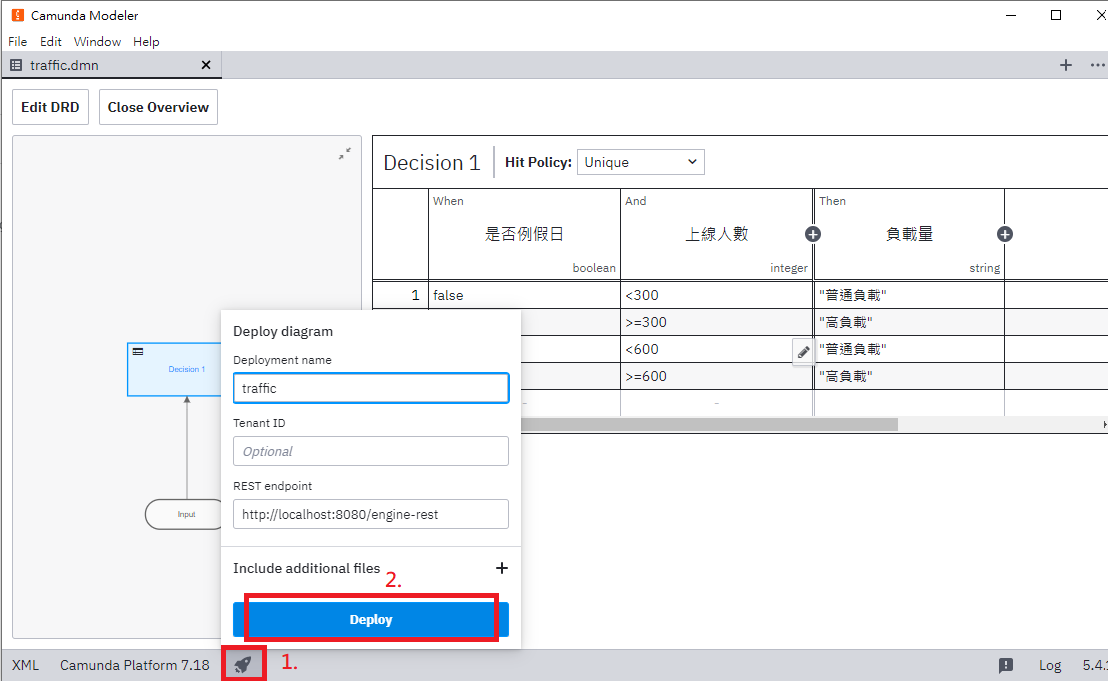
然後就可以部屬Decision Table了,點選火箭之後佈署在 Camunda Platform
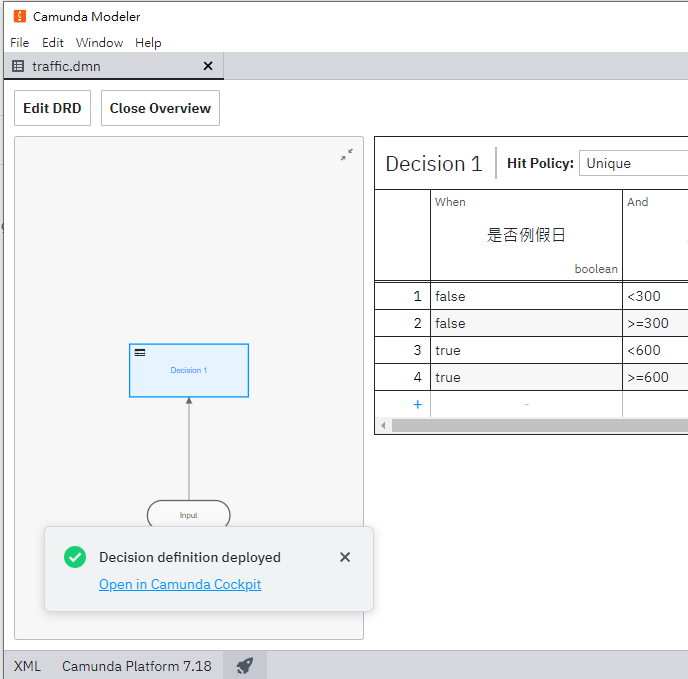
佈署成功
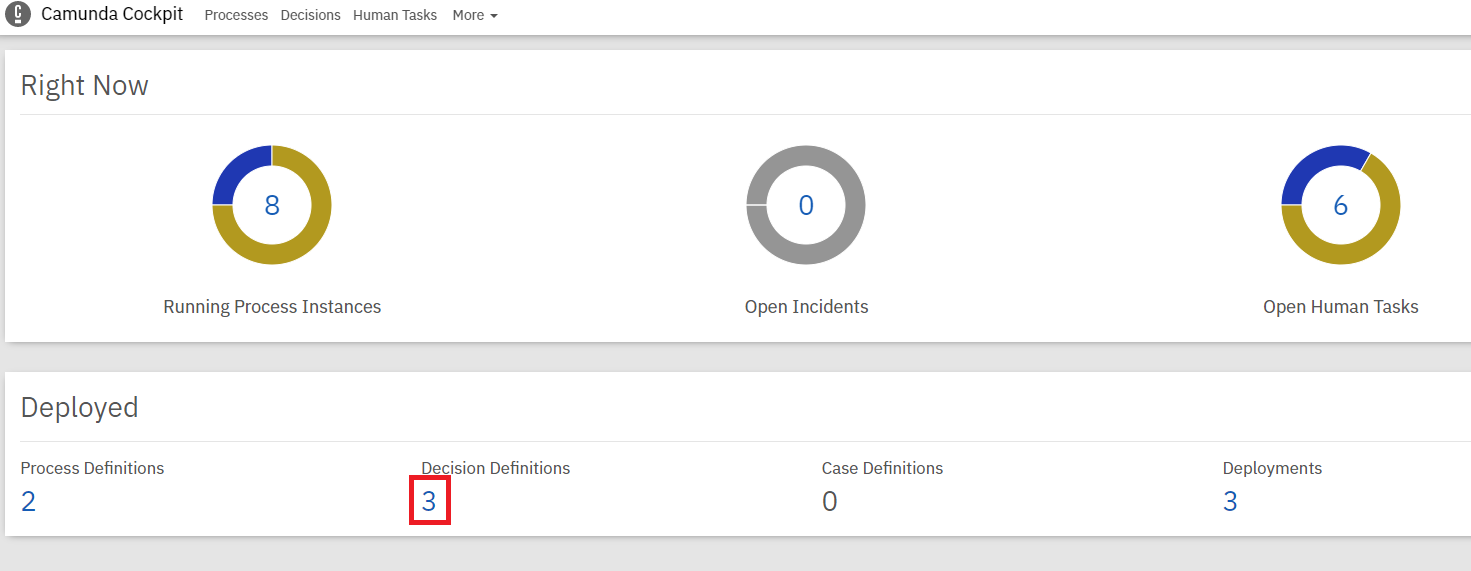
在瀏覽器上執行開啟 Camunda Platform Cockpit http://localhost:8080/camunda/app/cockpit/ ,可能會遇到需要登入預設的帳號密碼都是demo,然後點選 Decision Definitions
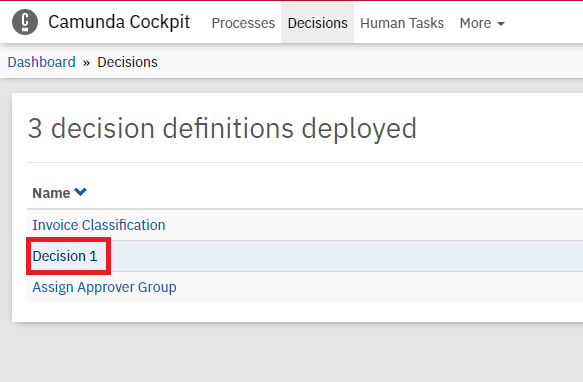
為了確認是否有正確佈署,點選 Decision 1 也就是我們前面用Camunda Modeler 創建 Decision Table 所取的名稱
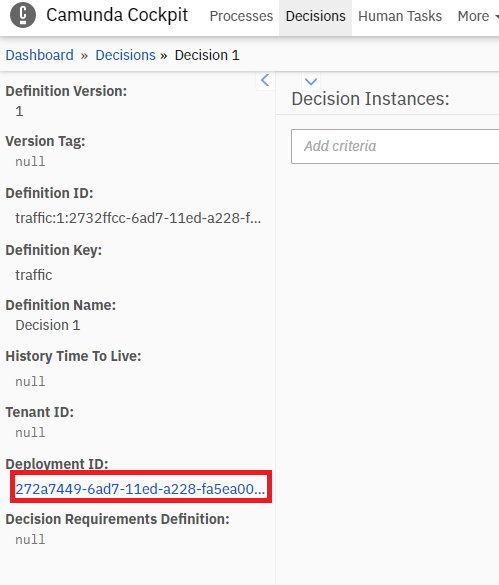
點選 Deployment ID
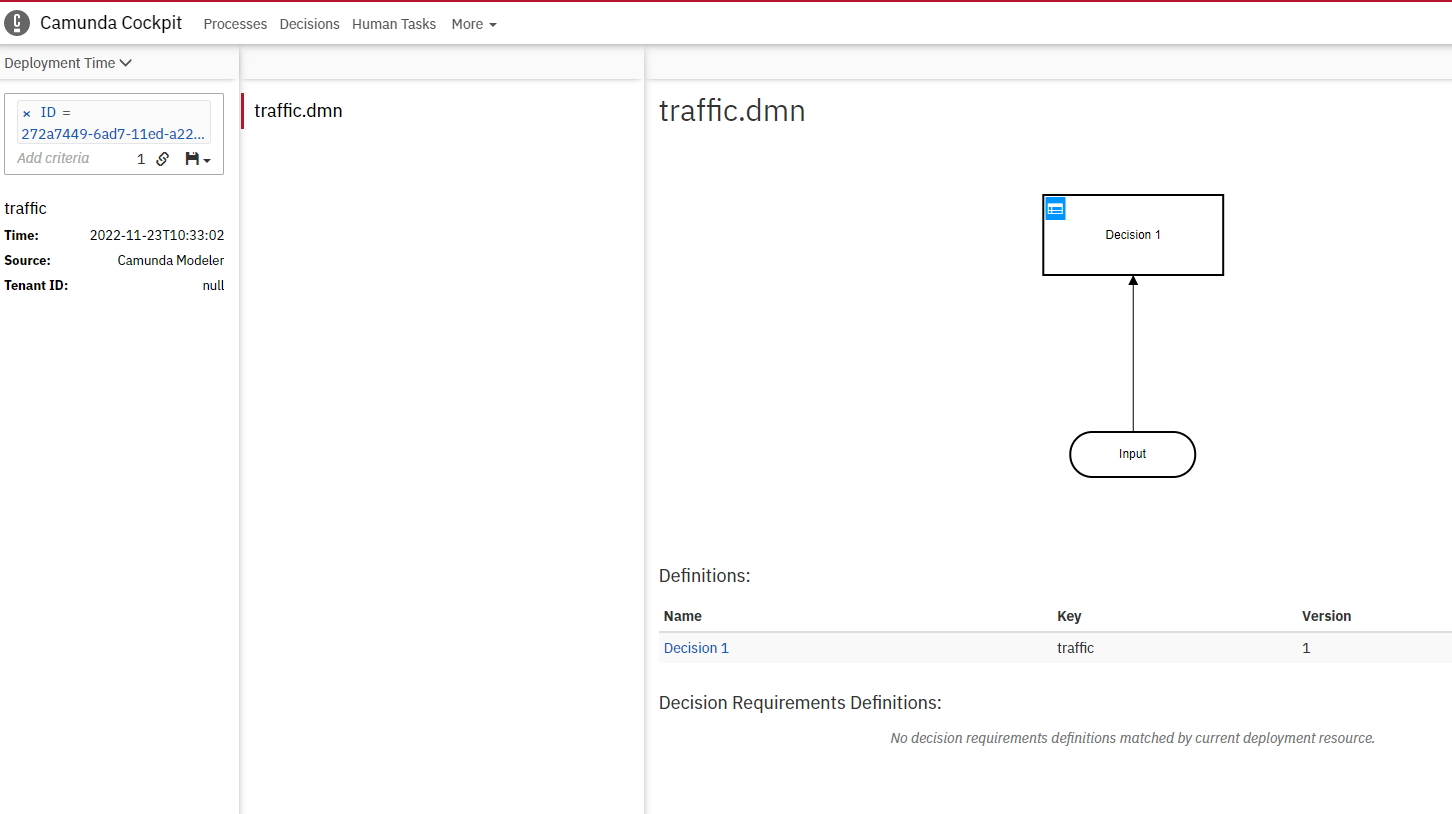
這時就可以在 Camunda Platform 上看到我們佈署的Decision Table了
REST API
可以參考官方網站上怎麼用REST API 啟動已佈署的 Decistion Table
以下擷取部分片段:
Evaluate Decision
Evaluates a given decision and returns the result. The input values of the decision have to be supplied in the request body.
Method
POST
/decision-definition/{id}/evaluatePOST
/decision-definition/key/{key}/evaluate(evaluates the latest version of the decision definition which belongs to no tenant)POST
/decision-definition/key/{key}/tenant-id/{tenant-id}/evaluate(evaluates the latest version of the decision definition for tenant)
用REST API 來使用佈署在Camunda Platform 的 DMN
這裡我們使用API測試工具 POSTMAN
先使用GET 對以下URL取得目前DMN的狀態,注意key就是Decision
Table的ID,是前面我們自己設定的traffic, Camunda 回應
traffic.dmn 的相關資訊。
http://localhost:8080/engine-rest/decision-definition/key/traffic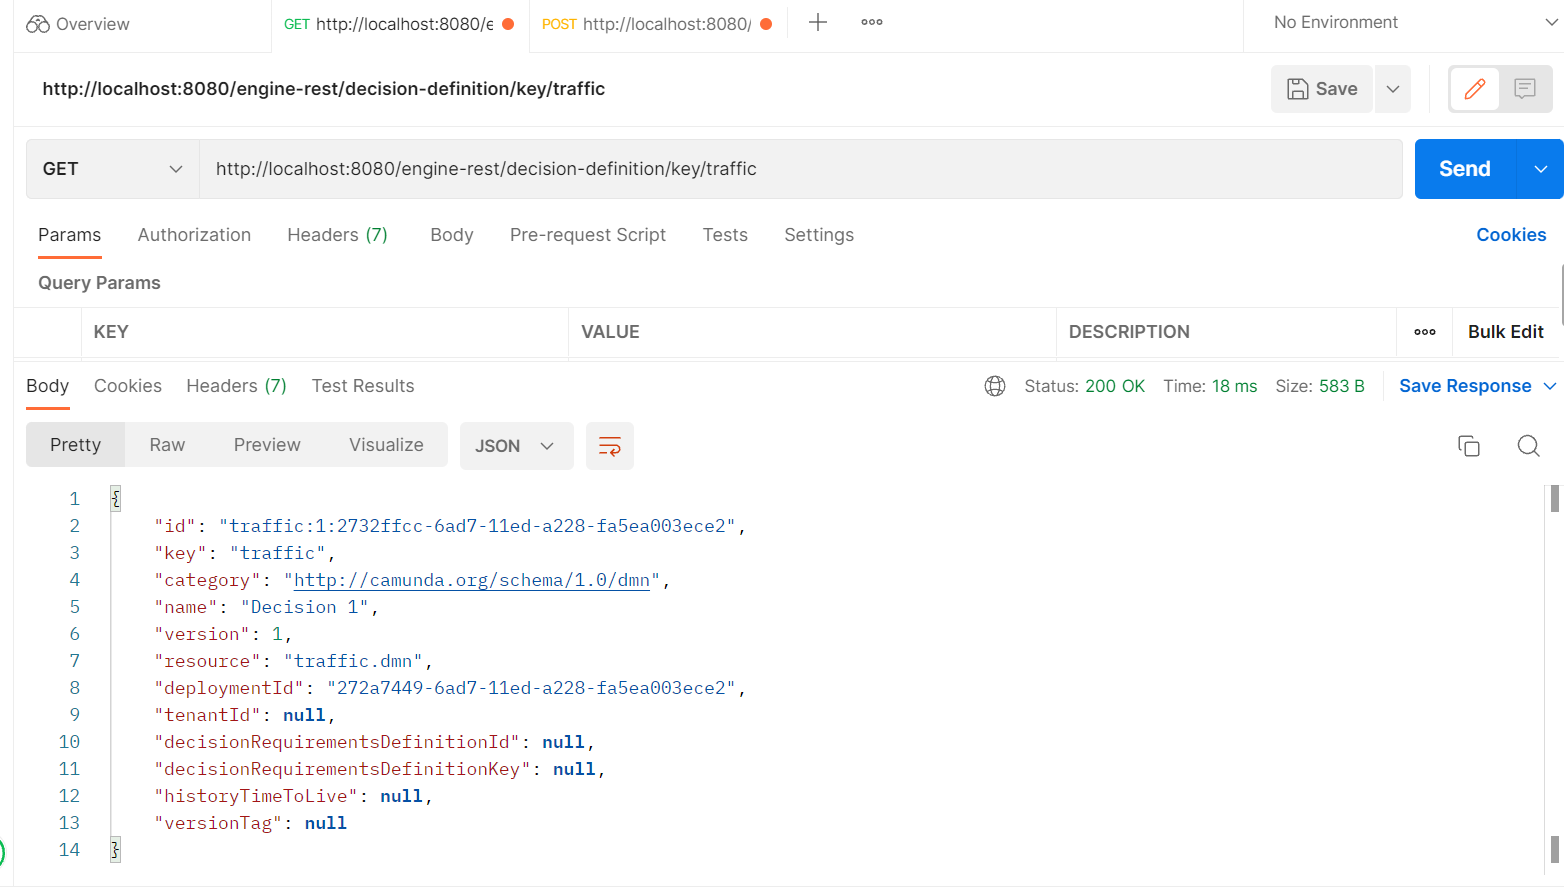
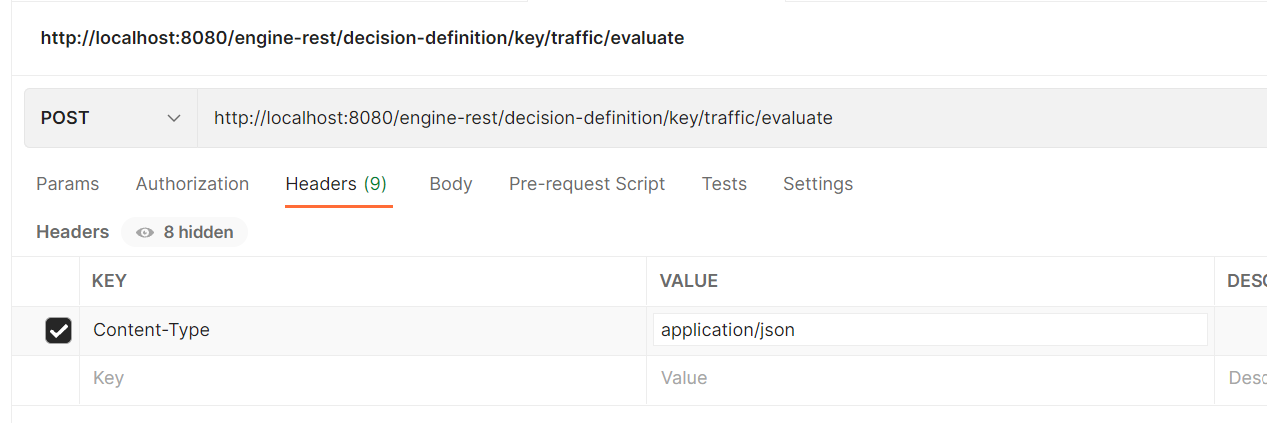
接著透過REST API來用DMN做決策,POST 的URL 如下
http://localhost:8080/engine-rest/decision-definition/key/traffic為了用DMN來做決策 (evalute),需要增加POST的Header,Content-Type: application/json
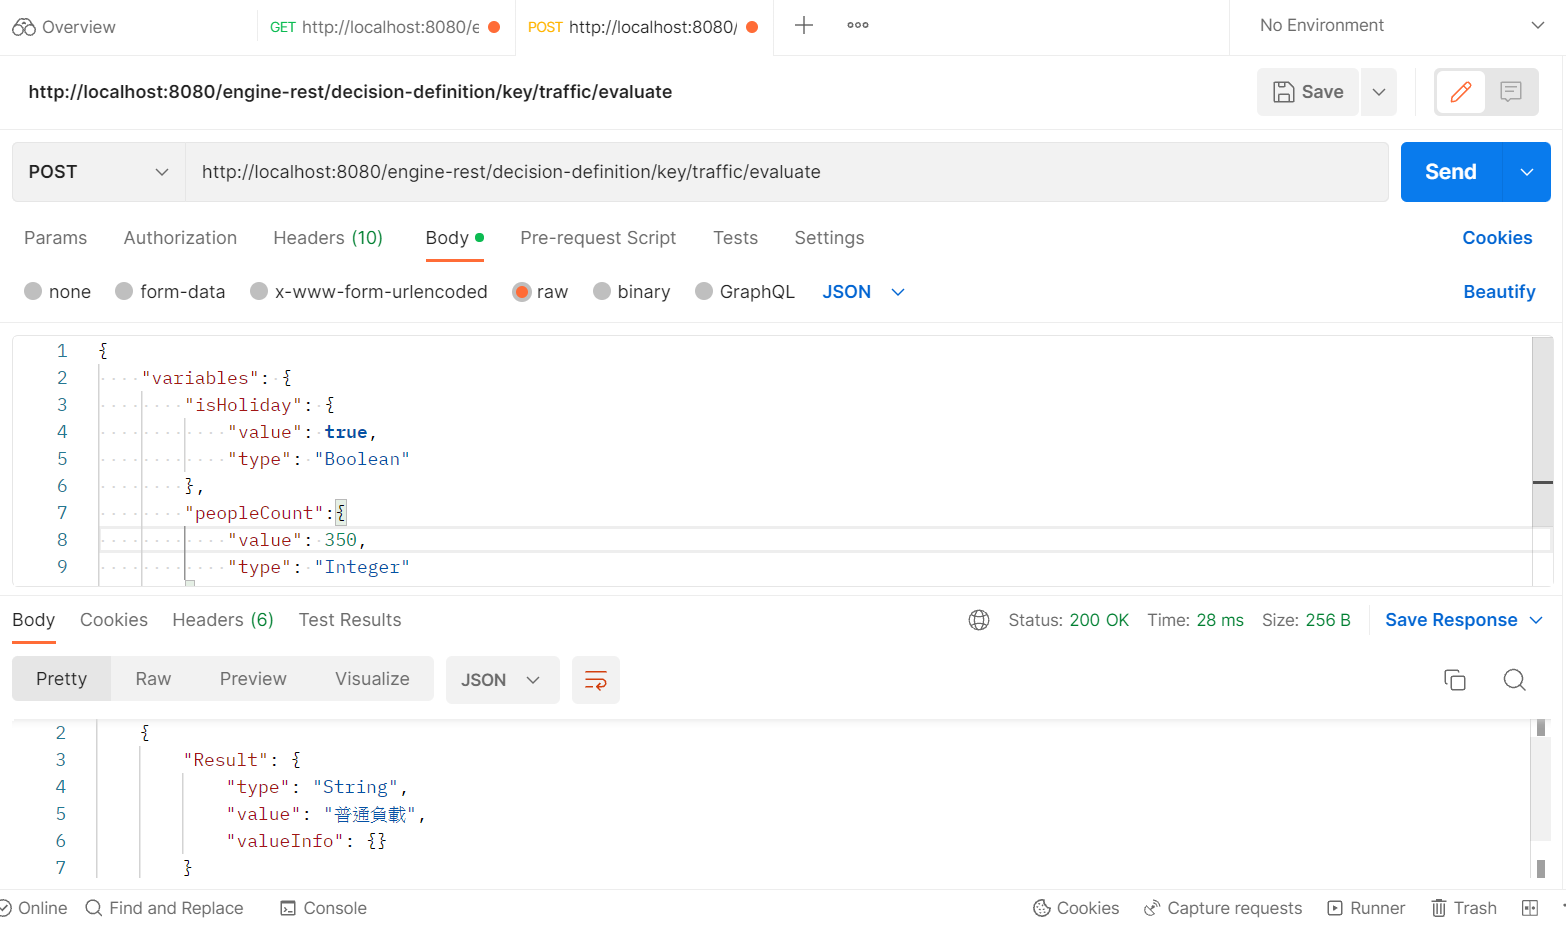
將 json body post 上去,讓Camunda 上佈署的 DMN來決策,Post Body 如下
{
    "variables": {
        "isHoliday": {
            "value": true,
            "type": "Boolean"
        },
        "peopleCount":{
            "value": 350,
            "type": "Integer"
        }
    }
}
決策結果,在假日時且有350的上線人數,是普通負載
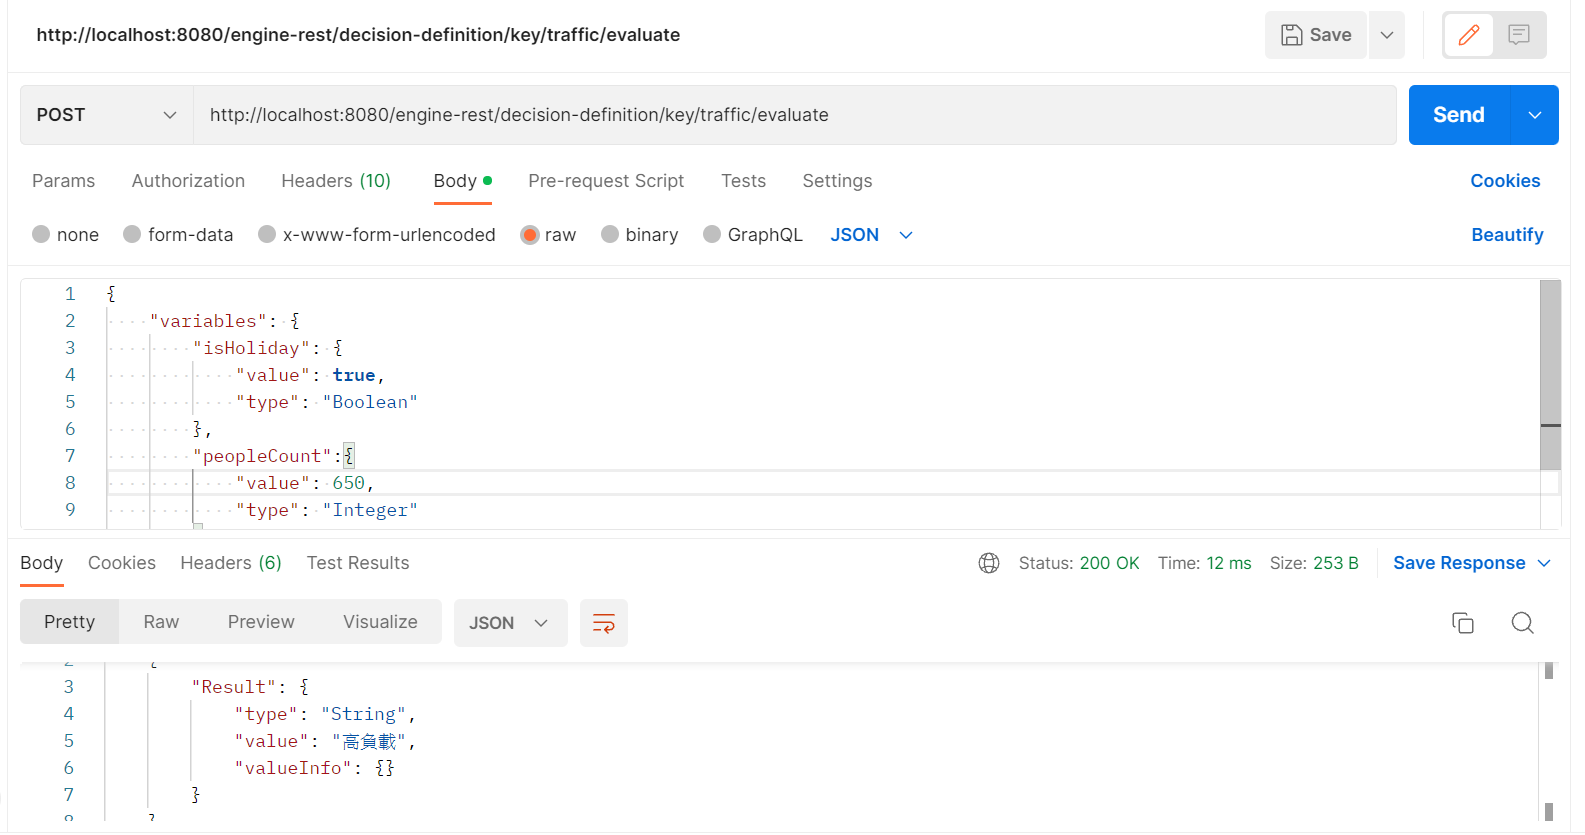
更改post body,當上線人數為650時候,就是高負載
{
    "variables": {
        "isHoliday": {
            "value": true,
            "type": "Boolean"
        },
        "peopleCount":{
            "value": 650,
            "type": "Integer"
        }
    }
}
透過REST API可以用各種程式語言來與Camunda Platform溝通,將商務邏輯決策表的部份抽出來,變成DMN元件,讓Camunda Platform 來管理業務邏輯的部分。
貳、用 JAVA (SpringBootApplication) 來發起 DMN 決策
先將做好的maven project git clone 下來
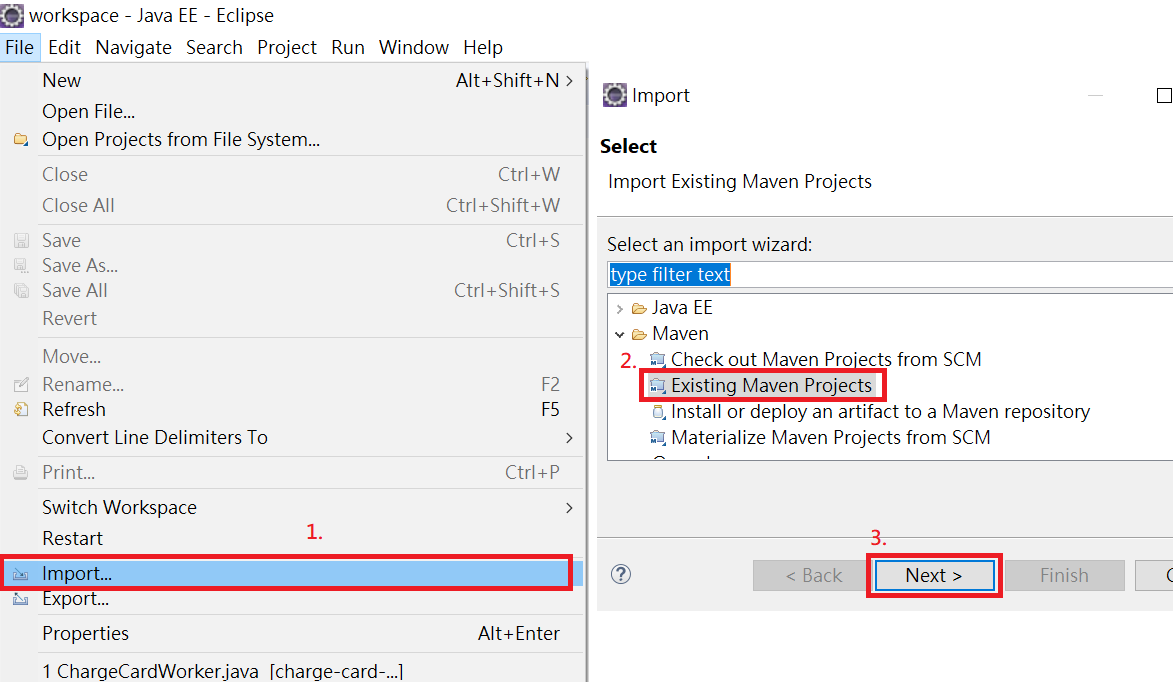
git clone https://gitee.com/zoollcar/camunda-get-started-spring-boot-and-dmn.git接著用Eclipse將Maven專案匯入
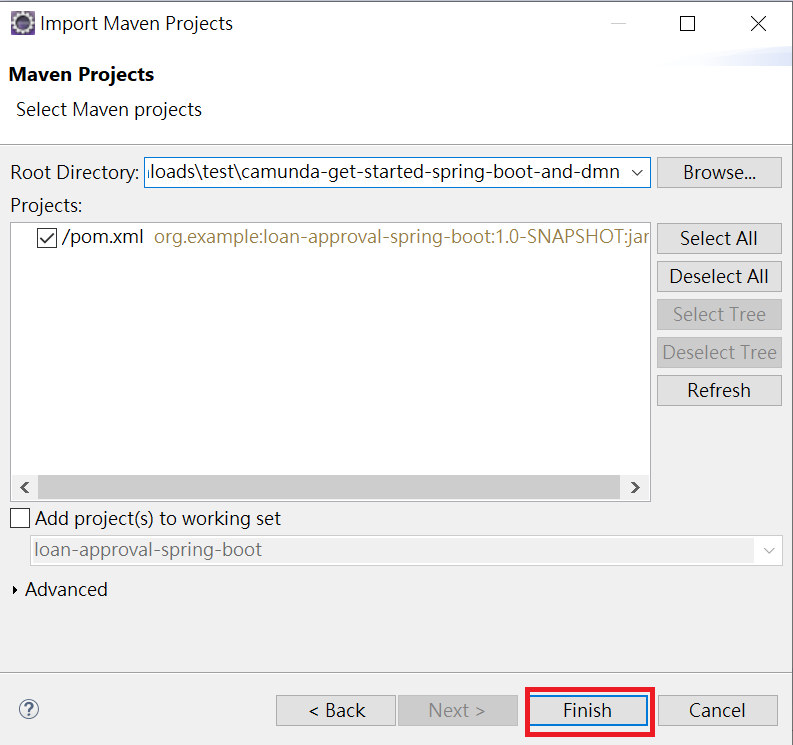
選擇剛剛clone的專案匯入
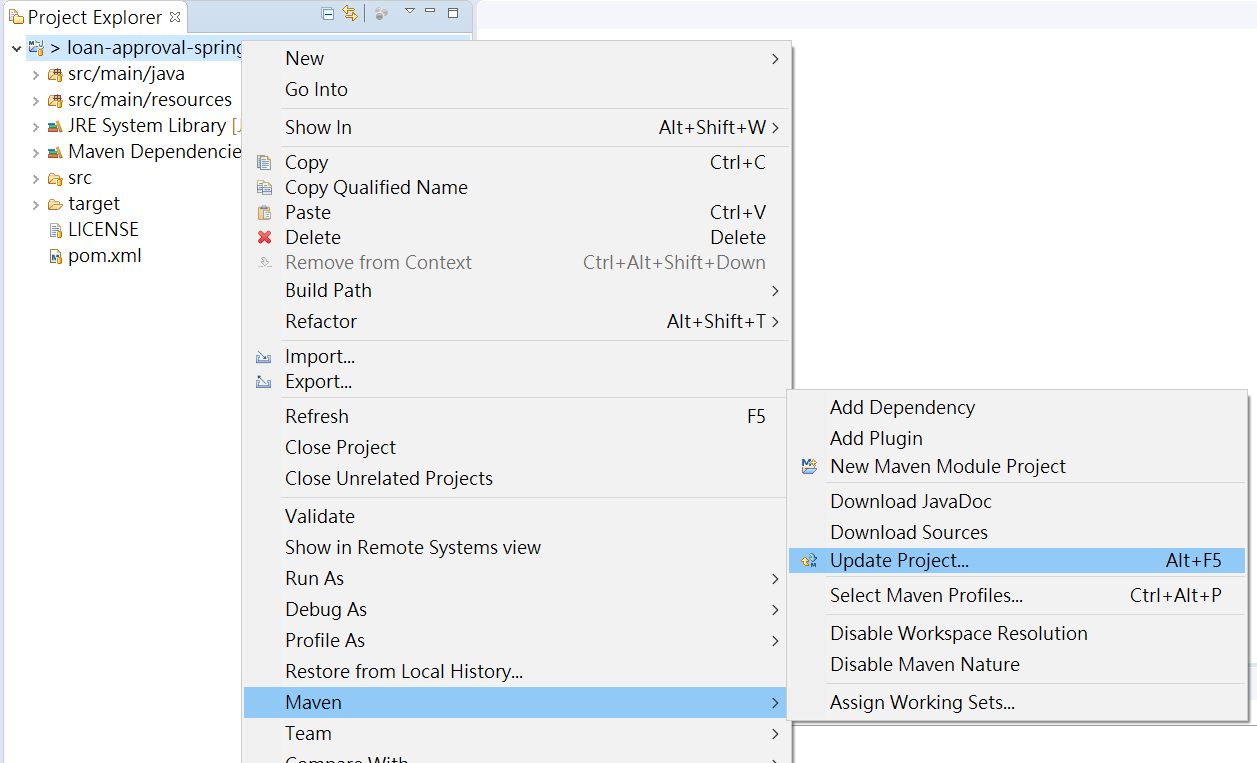
更新一下Maven 的依賴
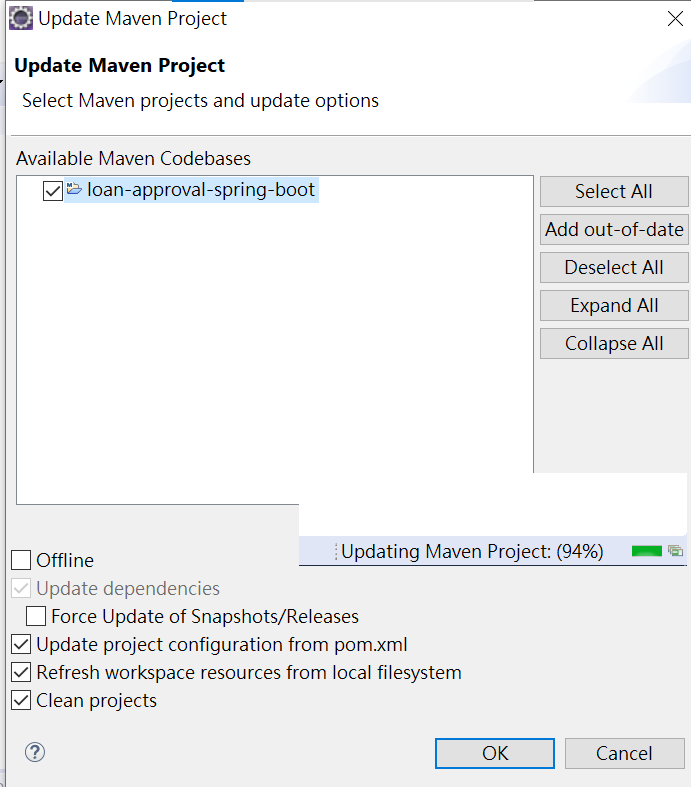
點選確定,注意Eclipse 右下角會跑一個進度條,要跑滿才更新成功,如果無法順利更新,注意是否是網路問題
有時候還是會有問題,這個時候maven clean然後maven install
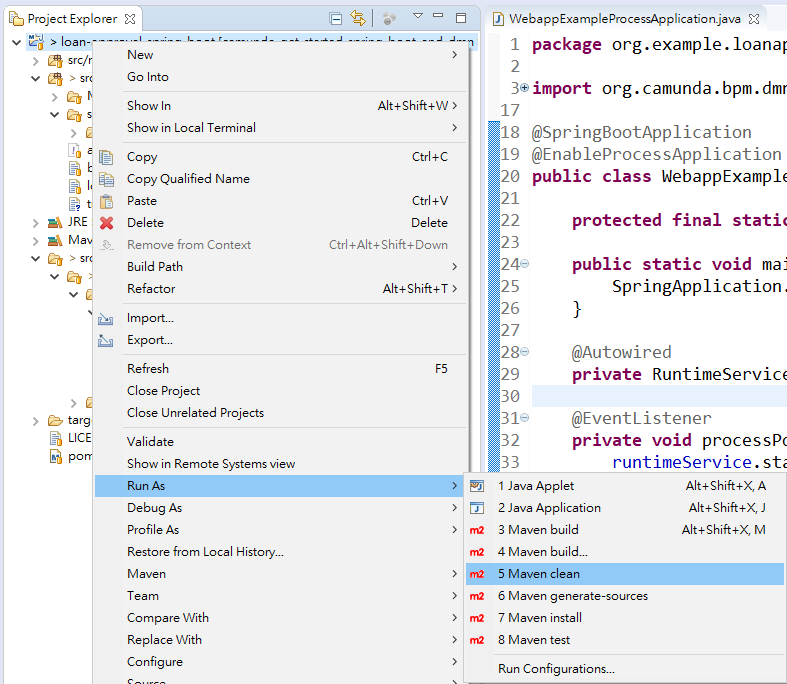
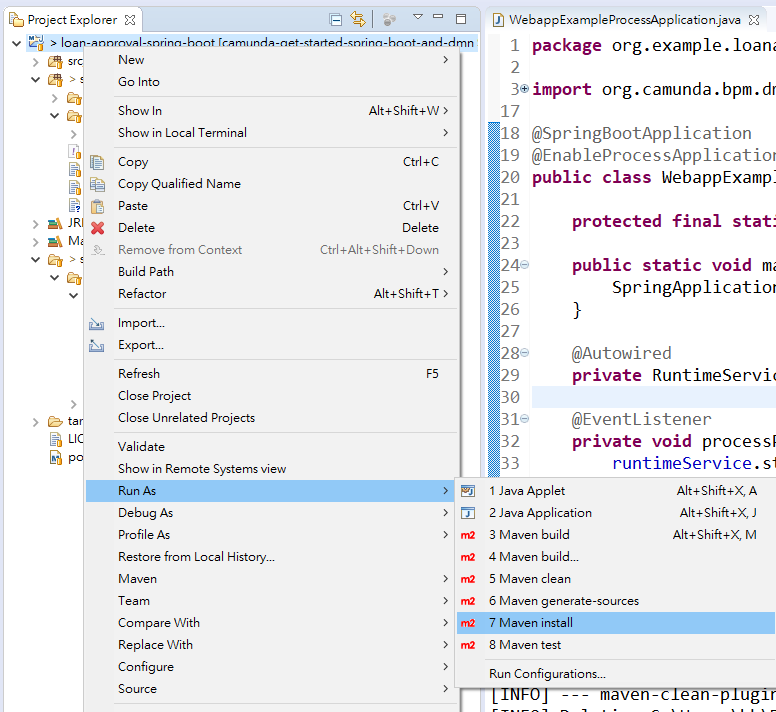
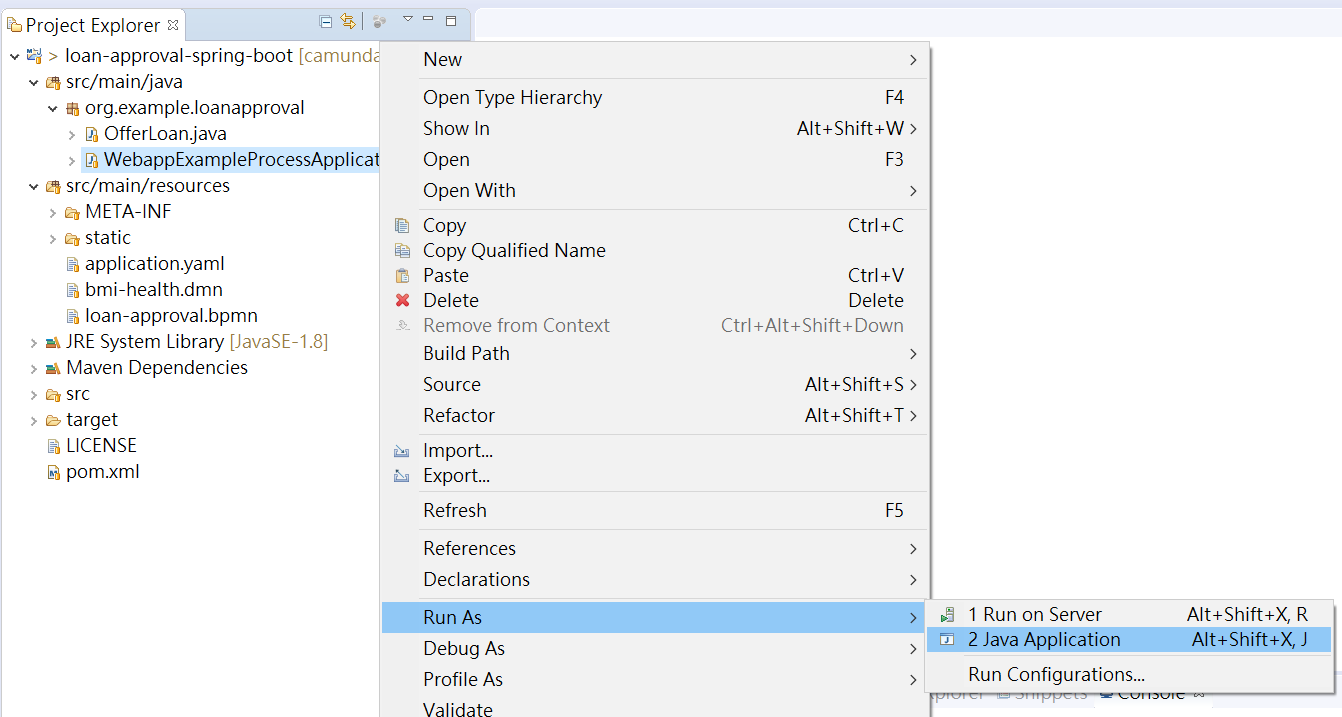
接著我們來執行這個專案中的
DMN,執行WebappExampleProcessApplication這個class,Run As
-> Java Application
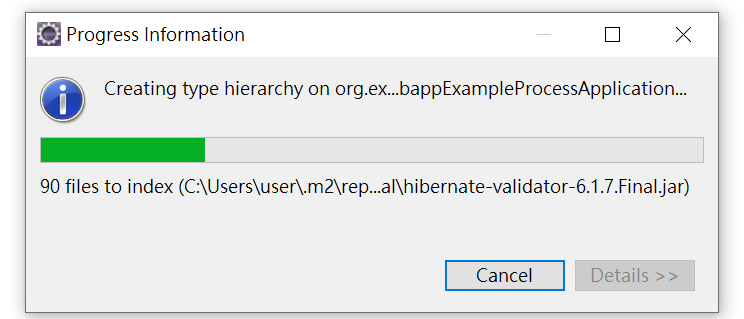
在RUN的時候,可能會建構一些web相關的組態,第一次執行會花一些時間
Evaluate成功,在Console開啟 Camunda Platform 並且顯示決策結果 ,BMI正常
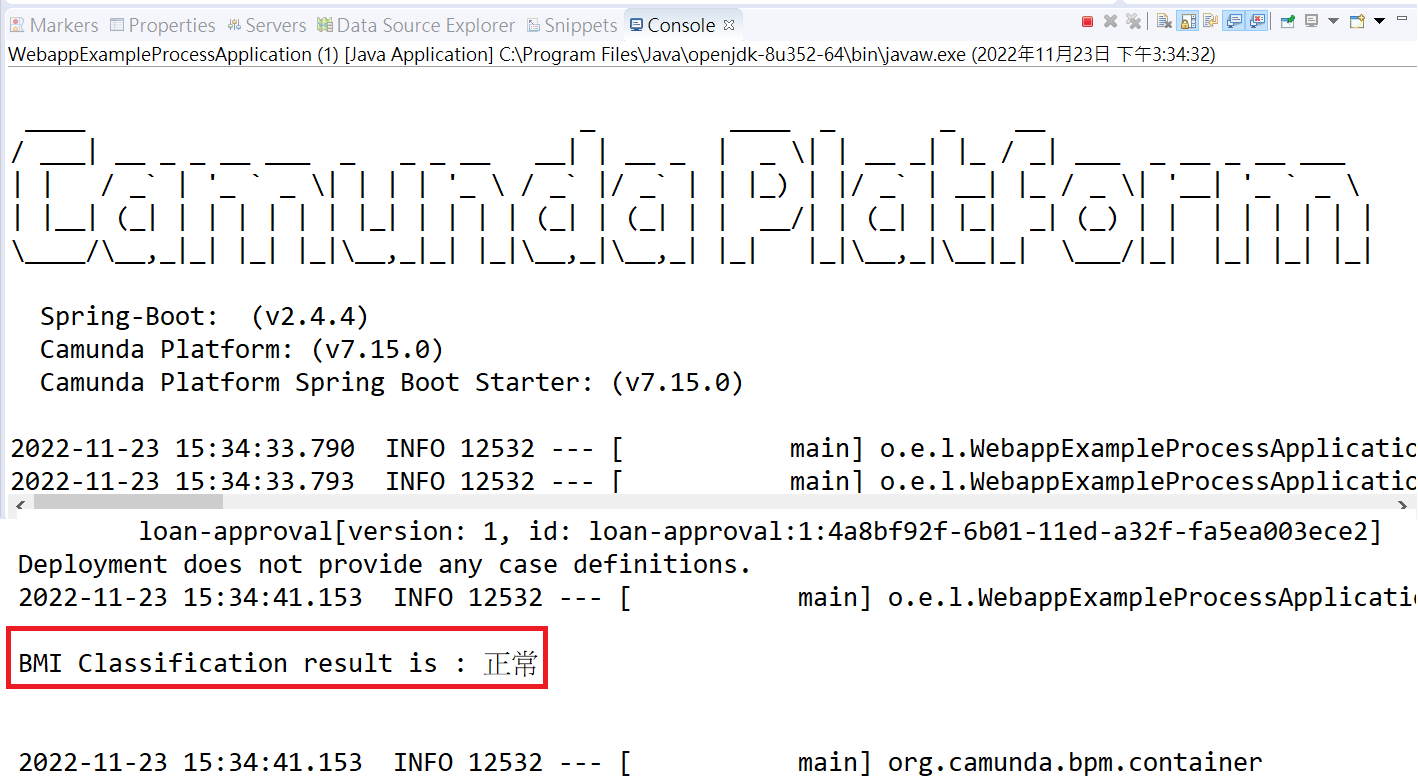
對應到
WebappExampleProcessApplication.java的第37行,BMI20被
bmi-classification 這個DMN 分類在正常範圍
此時打開瀏覽器輸入Camunda的網址 http://localhost:8080/camunda/app/cockpit/ ,帳號密碼都是demo,點選 Decision Definitions
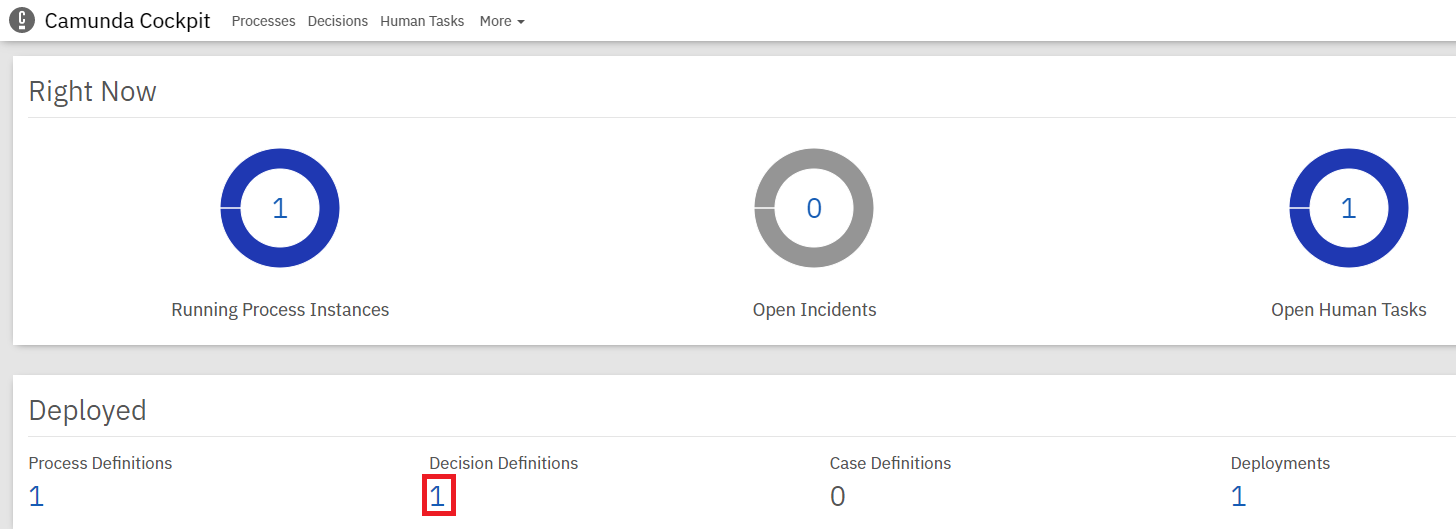
在Camunda Platform中可以看到剛剛發起的決策與結果
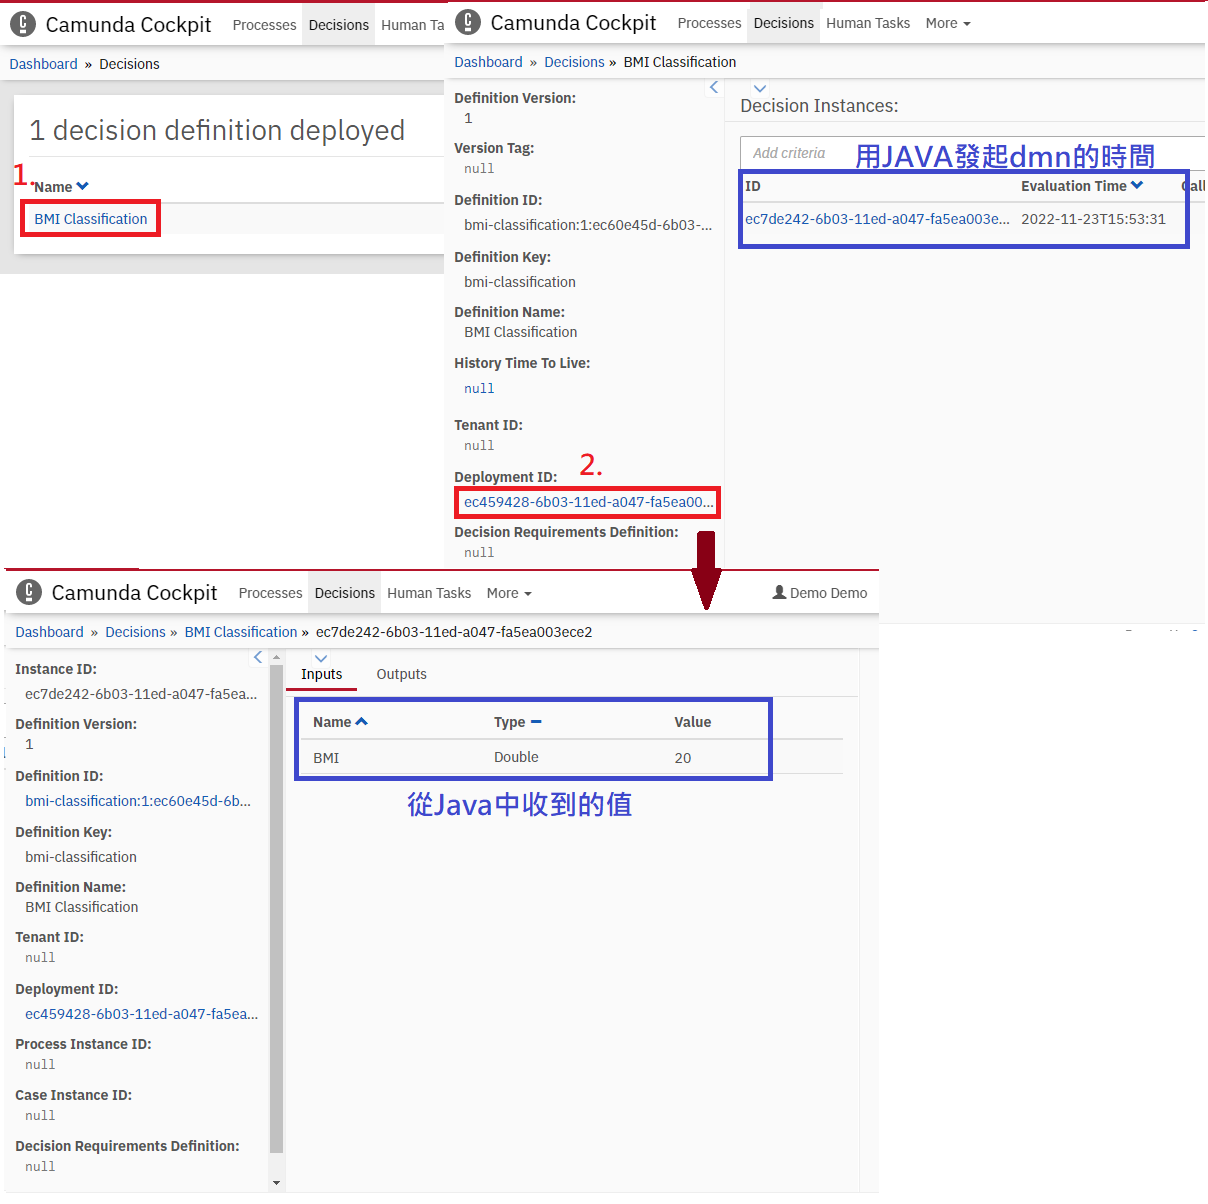
輸出的結果

記得如果要在執行一次用JAVA發起決策,要記得關掉上次的運行,否則會出現8080 port被占用
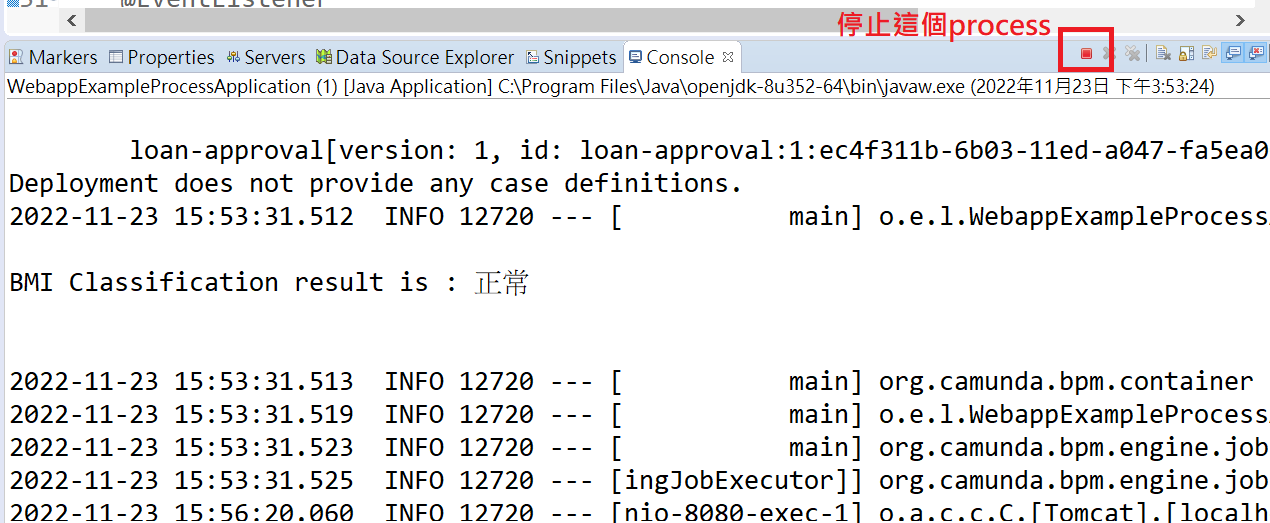
如果出現8080被占用,可以用cmd將 占用8080 port的 Camunda刪除
將前面建立的traffic.dmn
移動到src/main/resources 路徑下
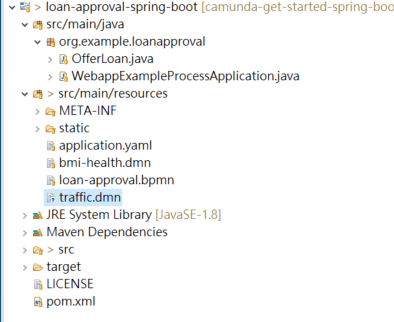
直接更改WebappExampleProcessApplication.java的部分程式碼,需要更動的為3740行,並且刪除4450行關於"bmi-suggestion"
這個DMN的後續判斷更改後的processPostDeploy Method如下
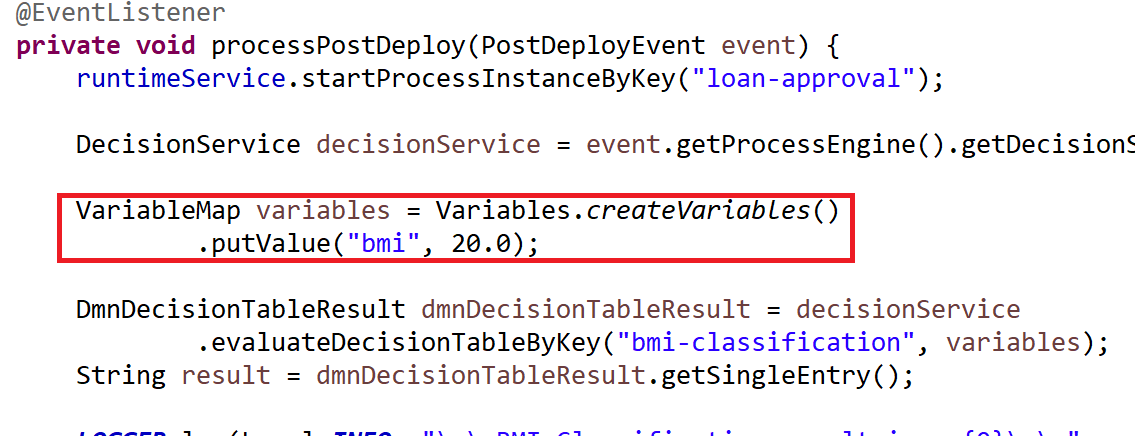
@EventListener
private void processPostDeploy(PostDeployEvent event) {
    runtimeService.startProcessInstanceByKey("loan-approval");

    DecisionService decisionService = event.getProcessEngine().getDecisionService();

    VariableMap variables = Variables.createVariables()
            .putValue("isHoliday", true).putValue("peopleCount", 520);

    DmnDecisionTableResult dmnDecisionTableResult = decisionService
            .evaluateDecisionTableByKey("traffic", variables);
    String result = dmnDecisionTableResult.getSingleEntry();

    LOGGER.log(Level.INFO, "\n\n Traffic result is : {0}\n\n", result);

}執行WebappExampleProcessApplication.java執行方法 Run As
-> Java Application

如果出現以上錯誤,可能是直接用Eclipse創建一個
traffic.dmn並且在Eclipse中貼上檔案的內容,這樣會出問題的原因是編碼錯誤,在windows之下,Eclipse的預設編碼方式為MS950,但是Camunda
.dmn的編碼為UTF-8,而且traffic.dmn又有中文內容,導致camunda
platform無法解析。解決方法就是用其他文字編輯器,確定編碼方式為UTF-8再把內容貼上存成traffic.dmn。
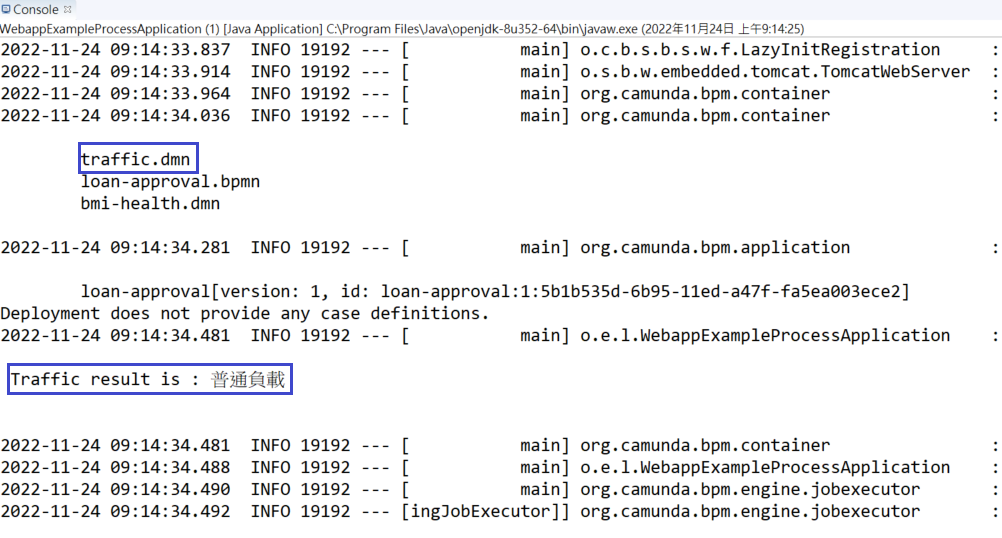
如果正確執行以上程式,結果如下,有正確解讀traffic.dmn,並且用該DMN的rule來做決策,當是否假日("isHoliday")=true
且
上線人數("peopleCount")=520,因為未達假日的高負載門檻600,所以輸出為普通負載
以上結論發現,使用JAVA透過spring boot 來呼叫Camunda 整合性很高,會直接將Camunda 跑起來,並且發起一個決策,比起透過REST API還要手動開啟 Camunda Platform有一定的便利性,不過限制需要使用 Camunda 原生支持的語言,如 Java 與 Javascript。
流程引擎框架 Camunda 介紹就介紹到這裡,下篇會介紹如何建立 BPMN 並且透過 REST API 發起一個流程。
Reference
https://docs.camunda.org/get-started/quick-start/
https://camunda.com/blog/2018/02/custom-tasklist-examples/
http://www.tup.com.cn/upload/books/yz/087906-01.pdf https://docs.camunda.org/get-started/dmn/model/ https://www.tpisoftware.com/tpu/articleDetails/2623