DigiVFX |
 |
Digital Visual Effects, Spring 2006
|
Jump to...
project #1
|
project #2: Image StitchingAssigned: 2006/3/26Checkpoint: 2006/4/16 Due: 2006/4/30 11:59pm artifacts, winning artifacts Project descriptionImage stitching is a technique to combine a set of images into a larger image by registering, warping, resampling and blending them together. A popular application for image stitching is creation of panoramas. Generally speaking, there are two classes of methods for image stitching, direct methods and feature-based methods. An example of direct methods is Szeliski and Shum's SIGGRAPH 1997 paper. Brown and Lowe's ICCV2003 paper, Recognising Panoramas, is a cool example for feature-based methods.In this project, you will implement part of the "Recognising Panoramas" paper. There are basically five components in that paper, feature detection, feature matching, image matching, bundle adjustment and blending. You are required to do feature detection, feature matching, image matching and blending. For feature matching, we have talked several options, SIFT, Harris and MSOP. You are free to make your own choice. If you want to implement SIFT, you can refer to this matlab implementation as a reference. Bundle adjustment is optional, but the results might not be as good if you choose not to implement this. You have five weeks to finish this project. However, to encourage you not to wait until the last minute, you are asked to submit your feature detection and matching part at tthe checkpoint, 4/16. We provide a skeleton code for this project. It essentially provides skeleton code for image stitching and blending, but not feature detection. This skeleton code and project itself is based on the projects of UW CSE576. You are encouraged to refer to those projects. Finally, sign up here to borrow cameras. Bells and whistlesStudents will get extra points if they implement any of the following extensions:
SubmissionYou have to turn in your complete source, the executable, a complete test example and instruction to run the test, a report in html format (including all resources) and your favorite artifact. The report could contain a description of this project, what you have learned from this project, description of the algorithm you implemented, implementation details, results (either good or bad), and what extensions you have implemented. You also have to submit your favorite artifact generated by the program you have implemented (not the reference software). For this project's artifacts, submit a stitched image using your own program from a set of images you take yourself. When taking pictures, remember to rotate your camera to increase vertical FOV if you want to create a panorama.Reference softwareThere are many panorama software out there on line. Here, we use autostich as the reference software for this project. Note that this software only stitches one panorama, instead of recognizing and stitching all possible panoramas.Test dataWe provide five sets of test data so that you can start to work on this project before you take pictures.pictures taken with tripods   pictures taken without tripods  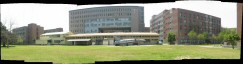
 set of images for testing panarama recognition provided by Matthew Brown 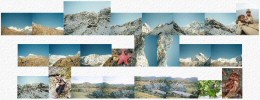 More test image sets can be found here. Put your image into a panorama viewerWe will use Live Picture viewer to display cylindrical panomara images. The instruction to put your image into Live Picture viewer is based on this page.Assume that you have assembled your cylindrical panorama image named pano.jpg. To display this image, in the same directory, you need an IVR file to specifying field of view. Let's call it pano.ivr. Now, we have to embed the IVR file into a html file, pano.html, in the same directory. This html file should look like: <HTML> <BODY BGCOLOR="#000000"> <script language="JavaScript"> <!--// var myBrowser = navigator.appName; var myVersion = parseFloat(navigator.appVersion); if (myBrowser == 'Netscape' && myVersion < 4.0) { document.write('<applet archive="http://www.csie.ntu.edu.tw/~cyy/courses/vfx/java/lpjpanoNS3.zip" code="LPPano.class" width=500 height=300>'); } else { document.write('<applet archive="http://www.csie.ntu.edu.tw/~cyy/courses/vfx/java/lpjpano.zip" code="LPPano.class" width=500 height=300>'); } //--> </script> <PARAM name=cabbase value="http://www.csie.ntu.edu.tw/~cyy/courses/vfx/java/lpjpano.cab"> <PARAM name=file value="./pano.ivr"> </applet> </BODY> </HTML> and the IVR file pano.ivr should look like: #VRML V2.0 utf8 NavigationInfo { type "VISTA" headlight FALSE } Vista { texture ImageTexture { url "./pano.jpg" } type "CYLINDER" vFov -0.5 0.5 pitchRange -0.5 0.5 } vFov is vertical field of view of the panorama (in this case, -0.5 radians to 0.5 radians). pitchRabge should be set to be the same as vFov. Ideally, vFov should correspond to the field of view of your camera. If you don't know the field of view, you can just tweak the vFov until the panorama looks right. This is an example page showing a panorama using Live Picture viewer. And, here is another useful page to display your panoramic images. Reference
|
|||||||

|

|
|||||||